In addition to going to the community garden today, I started some seeds for my own home garden since the seeds I ordered finally came in. I wanted to start earlier but the seeds took some time to get to me. Oh well. NBD.
First of all here is what I got (all from reimerseeds.com)
- UC 157 Asparagus
- White Spear Onions (bunching onions)
- Mountain Mint
- Wando Sweet Peas
- Alexandria Strawberries
- Dwarf Greek Basil
- Dandelion
- Roman Chamomile
- Valerian
Plastic starting trays and cups are problematic in that the roots tend to hit the plastic and then start circling in a tangled clump inside the container, then when you plant that, the roots can still continue this root growth that has been "trained" by having it in the plastic pot and it can end up getting choked up in it's own roots. The way to help prevent this is to physically tease the roots out before planting, but that can cause damage and either way you're going to get some root-shock which means a delay in growth.
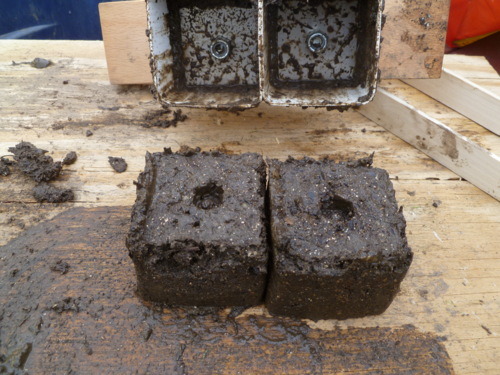
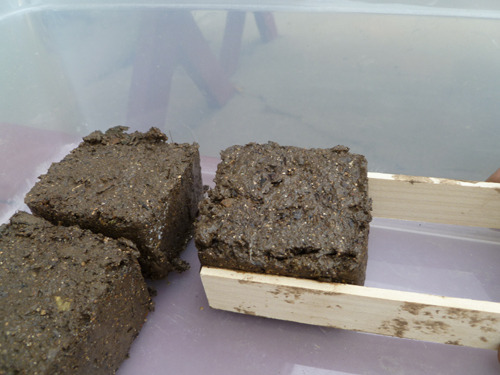
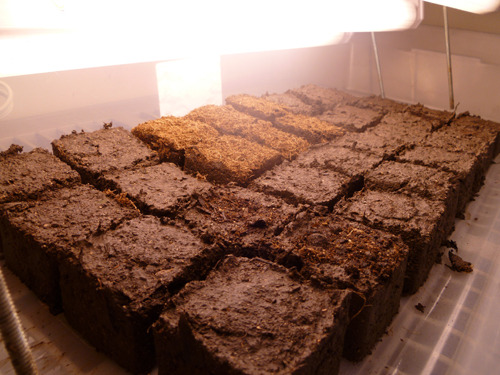
Peat is supposed to be nice because it's biodegradeable and you can supposedly just put the whole thing in the ground and the roots will grow out through the peat as it decomposes. Truthfully though, this can have the same problem as the plastic in inadvertently training the roots to grow in a compact tangled clump and frankly, I haven't found the peat pots to decompose all that well anyway.Soil cubes or blocks differ in that there is no container whatsoever, the soil is the container. Since there is no edge to the "container" the roots will simply stop growing when the hit the edge. Plants roots have their own intelligence that will keep them from popping roots out of the sides of the soil cube. Instead, it will make the root system a bit more robust within the cube which serves to hold the cube together when it's in that form and when placed into the ground will just take right off and grow out into the soil, eliminating root shock. As for watering, you just water lightly, but the compaction and the fact that the roots hold it all together make the whole cube pretty decently held together.
FYI: Though the tool may be modern, the method is nothing new. The Aztecs did something similar way back int he day.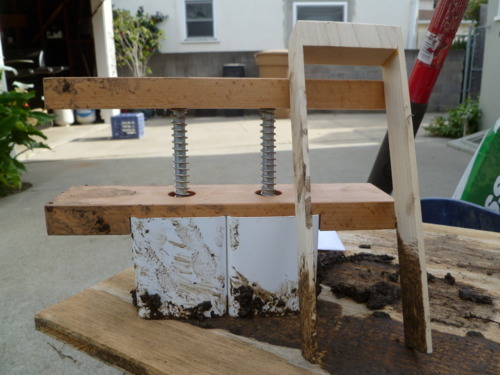
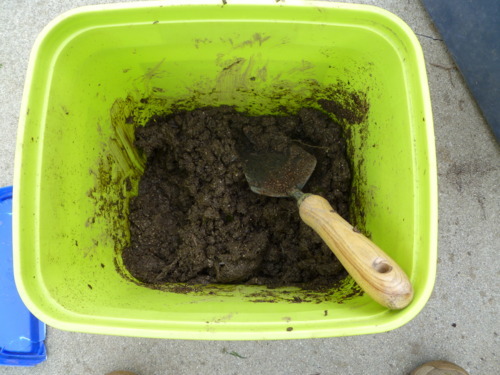
- 3 parts peat moss
- 2 sand and perlite mixed
- 1 part garden soil
- 2 parts compost
- a touch of lime and fertilizer

No comments:
Post a Comment